FluentCRM released an official integration with ThriveCart in their v2.3.0 update. This integration comes in the form of a new plugin add-on called Fluent Connect, which is installed under the add-ons section of the FluentCRM plugin.
Fluent Connect is also available inside the WordPress plugin repository, and will contact additional native integrations for FluentCRM in the future.
This new integration removes the reliance on external webhooks and tools such as Zapier in order to connect ThriveCart natively with the platform.
This simple process is broken up into four parts:
- Plugin setup
- API Integration between ThriveCart and FluentCRM
- Webhook from ThriveCart to FluentCRM
- Create Trigger and Event in Fluent Connect
You can watch the full tutorial where I walk you through each step of the process, or skip the video and follow along with the tutorial below.
Setting up the FluentCRM and ThriveCart Integration
Inside the WordPress admin area, find the FluentCRM section on the left and click on Addons.
Look for the Fluent Connect addon.
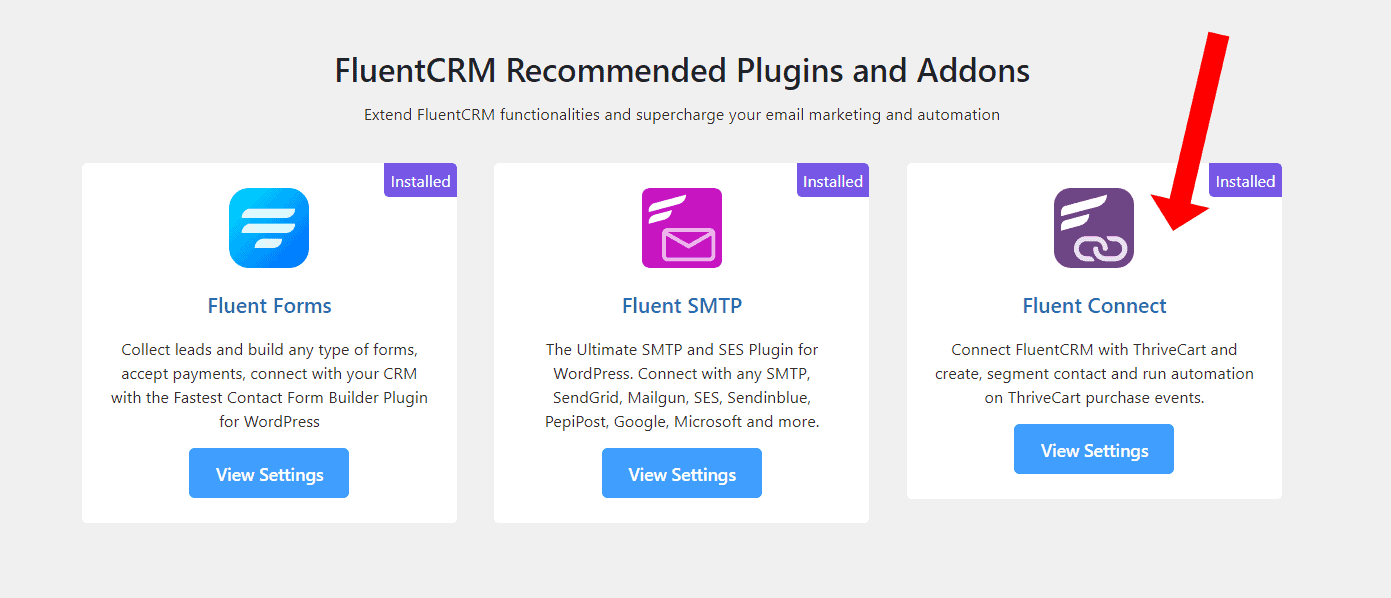
Install the addon then click ‘View Settings’.
Setting up the Fluent Connect <> ThriveCart API Integration
Next you’re asked to Connect with ThriveCart which means you need to obtain your API Key from ThriveCart so that FluentCRM (through Fluent Connect) can access the data inside of your ThriveCart account.

Obtain a ThriveCart API key by accessing your Account Settings > API & Webhooks > API Keys area.
Click ‘Create API Key’ and give it a name which only you will see. I recommend something to help you remember this is the key that connects with FluentCRM.
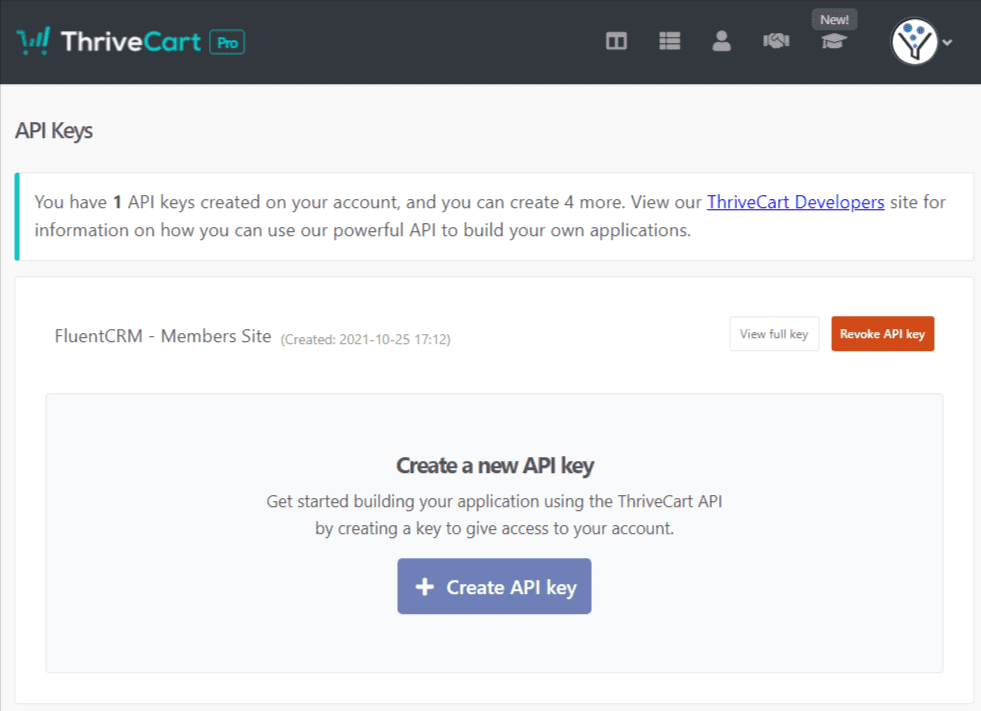
Copy the key it gives you because you’ll now go back into your website and paste that key into Fluent Connect.
Allow ThriveCart Notifications to Reach FluentCRM
Next you will be given a webhook URL. This URL allows ThriveCart to send purchase data to your website, whereas the previous step was allowing Fluent CRM access to your ThriveCart account.

Go back to your ThriveCart account and head back into Account settings > API & Webhooks > Webhooks & Notification.
Paste in your webhook url and give it a name that only you will see. Again, as before, this is to help you know what this webhook is next time to you come back into your ThriveCart account.
Save this webhook and head back to your website for the next step.
Create a Trigger and Event in Fluent Connect
Now that FluentCRM can access ThriveCart, and ThriveCart can send data to FluentCRM, we need to tell it when and what to do with these new connections.
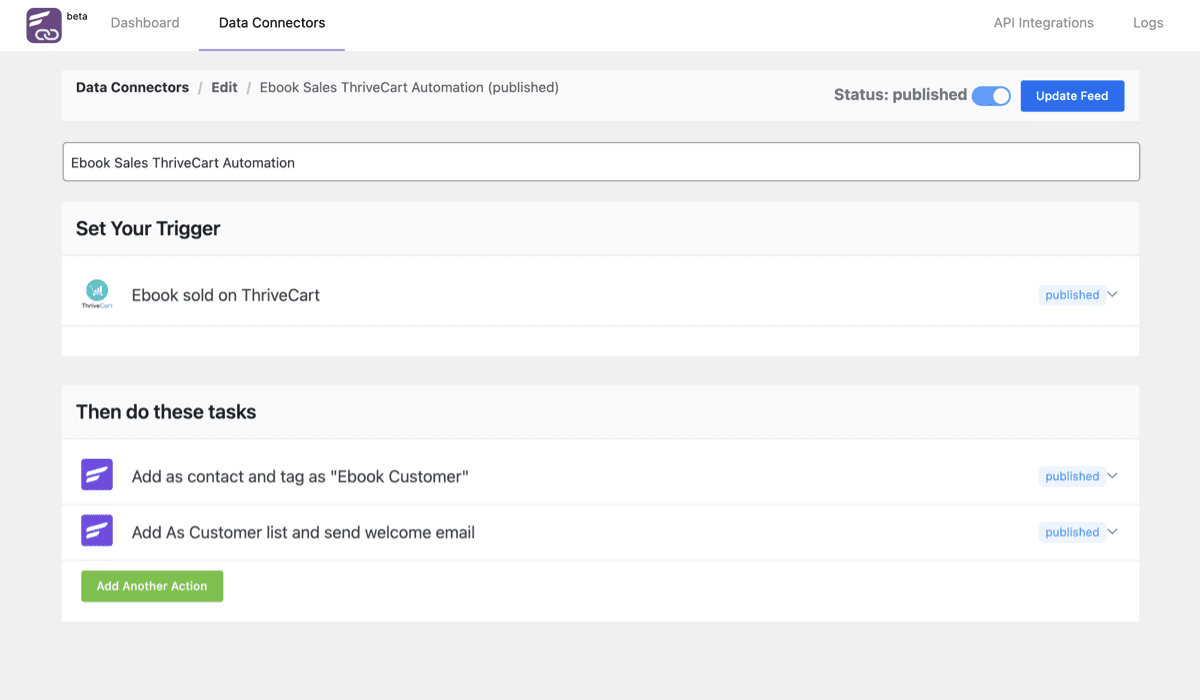
This next part should feel just like Zapier, Pabbly, or any other integration tool.
On the left side of the WP Admin area click ‘Fluent Connect’ and at the top go to ‘Data Connectors’. Tip: Think of “Data Conenctors’ like ‘Zaps’.
Click ‘Add New Connector’ and give it a name that only you will see.
Now choose ThriveCart as the triggering integration, and proceed with creating the exact trigger from ThriveCart such as a successful order. You can give this a name to help you identify the trigger.
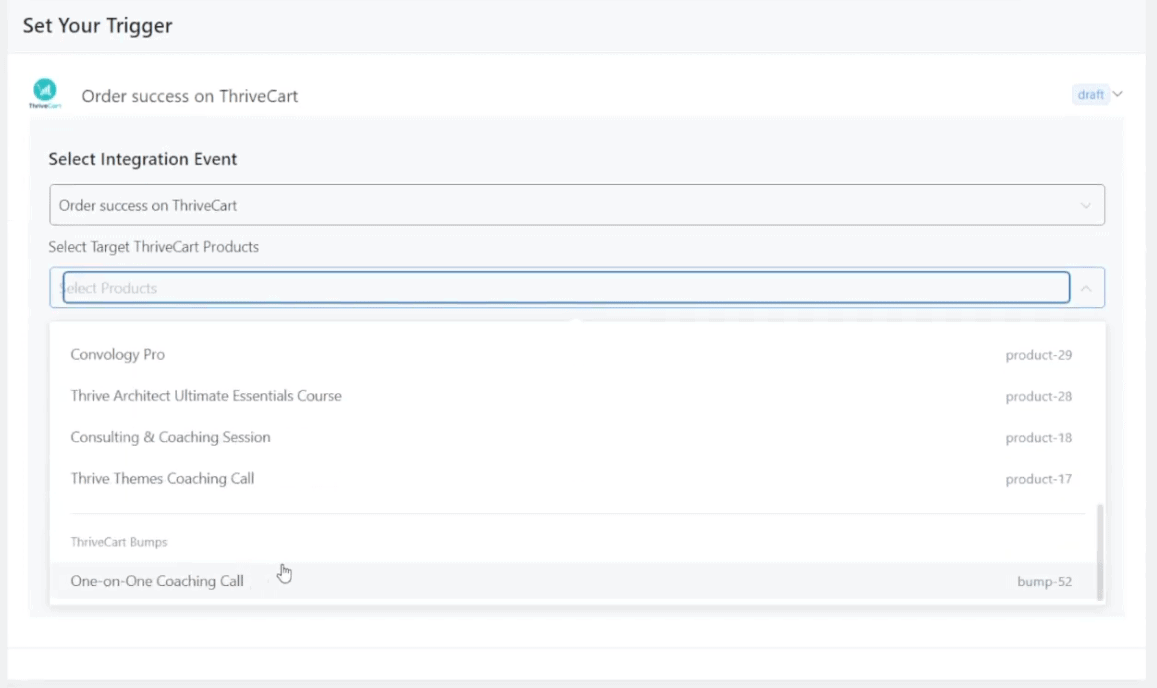
You’ll be able to filter your choices by your products that you have set up already in ThriveCart, as well as order bumps.
Next set up your event, which in this case is FluentCRM. You can choose what happens now when the trigger happens. This is likely tagging the person or adding them to a list in FluentCRM.
Publish your new trigger and event, and publish the connector.
ThriveCart is now connected to your FluentCRM setup!
Now what?
Now you can create automations inside FluentCRM that happen when the event is fired.
Perhaps you tagged someone who purchases your course. You can create an automation in FluentCRM to send a welcome email to anyone who has been tagged with that particular tag.
Essentially, now you use FluentCRM to create email sequences, automations, and communicate with your customers.

