Step 1: Connect Your Course to a Product
Products are what gets sold by ThriveCart. Think of products like a container that you can put all of your content, courses, pages., etc into and package them up nicely to sell them.
Products can be memberships, bundles, single courses, pages, or anything on your WP site that you want to sell. The product interface is simple to use and lets you check boxes to add content to a product.
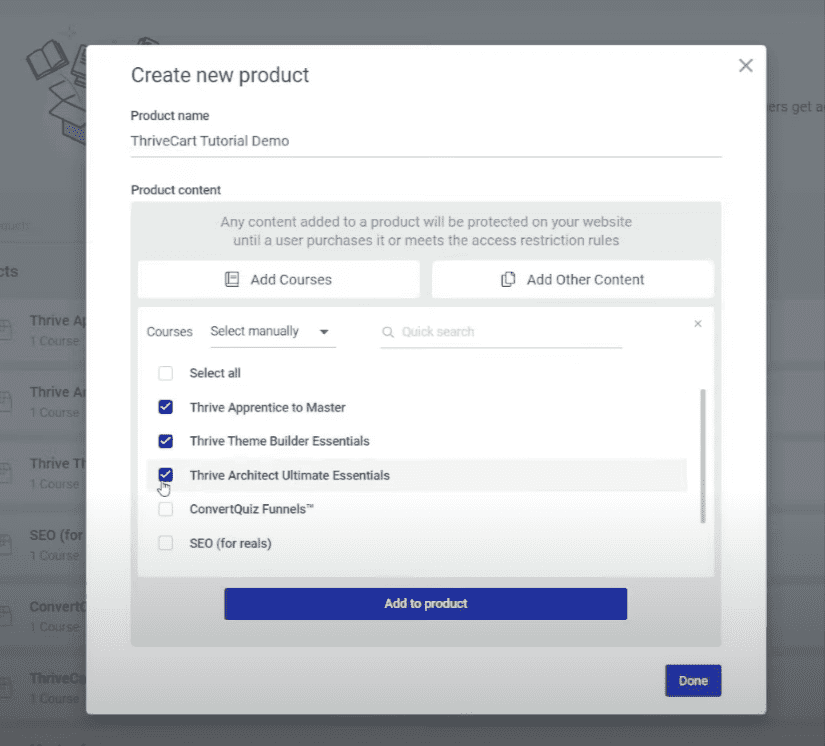
Learn more about products in my complete Thrive Apprentice 4.0 product tutorial.
Step 2: Access Restriction Rules
Access restriction rules are your site’s way of saying what happens if someone tries to access your content and isn’t logged in or is logged in but doesn’t’ have access.
Think of this as the “Error message” someone sees when they try to access your content and can’t.
Access restriction rules in Thrive Apprentice are more than errors, though. They are sales opportunities! If someone tries to access a course and isn’t logged in, you can show them a message that they aren’t logged in but can log in “here” and link them.
Since they’re not logged in, maybe they don’t own the course. We can add a button to direct someone to our sales page. And if they ARE logged in and don’t own the course yet, this is a perfect opportunity to sell send them to our sales page.
Step 3: Getting Students Their Login Credentials
Under settings > email templates > New account created we want to make sure we have “ThriveCart” checked at the bottom.
Now we customize this email template here because this is the only way users will get their credentials. ThriveCart will notify Thrive Apprentice that a user bought your product, and Thrive Apprentice will determine if they have an account or not. If they do, the product is added to their existing account. If they don’t, an account is created.
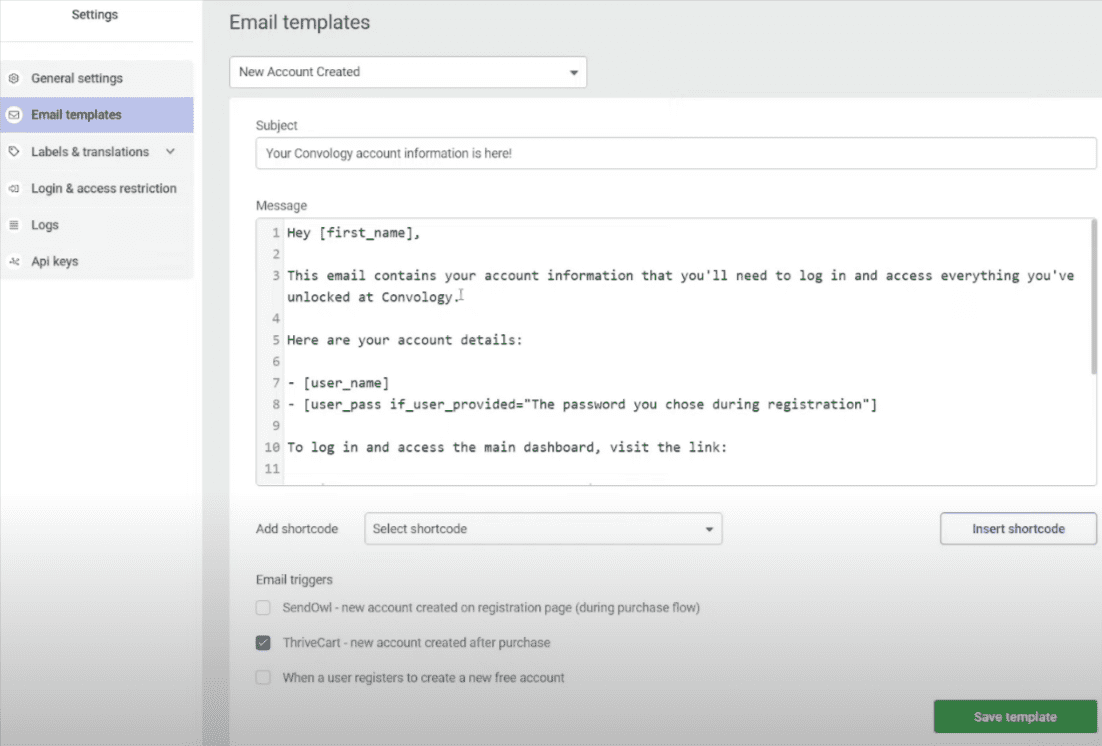
This is IN ADDITION to your “welcome packet” that you can send them from your autoresponder/email marketing tool.
Is your site not sending emails? I have a resource for how to fix it.
Step 4: Welcome Email Sequence
I use FluentCRM for my email marketing tool. When a user makes a purchase, they’re added to my email tool and an automation sends them a welcome email and applies them to all of the right lists.
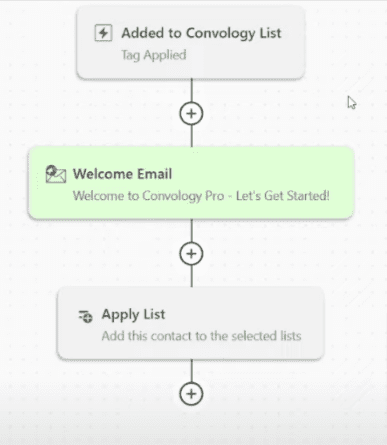
Then, I can send them an automated nurture sequence that I’ve pre-written.
This process is fairly standardized across all email tools, but I find FluentCRM’s integrations with Thrive Suite are by far the best.
If you’re asking, “Why can’t I use my email marketing tool to send login credentials,” the answer is pretty simple: WordPress can’t send that data to these tools.
Step 5: Tagging in Thrive Automator
Thrive Automator is like Zapier, but for your Thrive Suite tools.
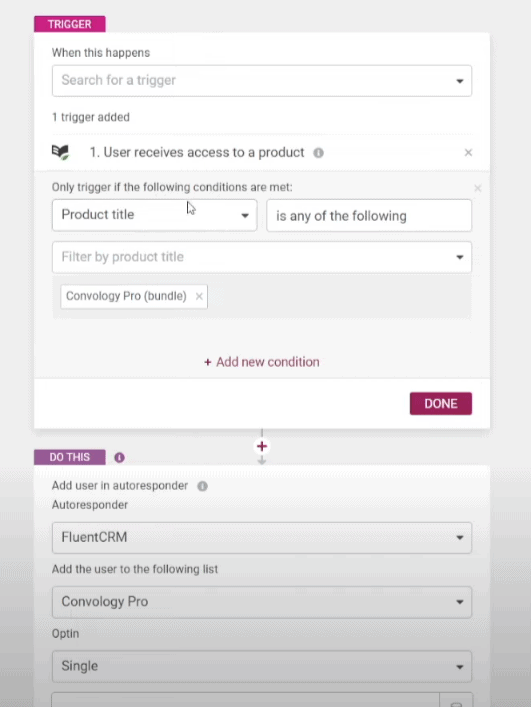
When someone gets access to a product, Thrive Automator allows us to tag the user in our autoresponder, send webhooks, and all sorts of amazing other features. Thrive Automator is quickly becoming the central “brain” of my entire website.
Step 6: Confirmation Page
The confirmation page is where users go after they purchase your product.
I recommend all of the standard onboarding features like a welcome video, what to do next (like check their email), and
This page can be built using Thrive Architect and exist within your membership site.
Did you know I use a subdomain for my membership site? Learn why subdomains are my preferred way of hosting a membership or course site on Thrive Apprentice.
Step 7: Login Page and Member Dashboard
I combine my login page and my dashboard into one single page. This creates the best user experience, and it makes complete sense when you think about the user login flow.
Users log in, and using conditional display the dashboard “magically” transforms into the “member dashboard”.
Need a full tutorial on how to do this? Check out my Custom Login Page + Dashboard with Conditional Display tutorial.
Step 8: Sales Page
Creating a sales page in Thrive Architect is really simple. Thrive has a lot of sales templates you can use and I have several available to Convology Pro members.
I recommend you disable the header so that people can’t navigate to random pages and wander off.
For our ThriveCart checkout, I like to link to the ThriveCart-hosted checkout pages. Alternatively, you can embed the checkout form directly on the page. The choice is yours for which you want to use.
Step 9: ThriveCart Product Setup
Setup is fairly simple, but there are a few key points for connecting Thrive Apprentice with ThriveCart that I want to go over.
In ThriveCart, go to settings and Integrations to authorize and connect ThriveCart to your Thrive Apprentice site. Follow the instructions to paste in your Thrive Apprentice API (found under Thrive Apprentice Settings > API Keys).
Back in ThriveCart, create a new product. I have a complete workshop on this available to Convology Pro members.
When you get to the fulfillment tab, it’s here that you select what happens after purchase. Chance “what should happen after purchase” dropdown to “add them to my membership site” and select the integration you just created.
Select the product you want to apply to the purchase.
Where it says “Login URL (optional)” you want to put your CONFIRMATION PAGE here.
In the checkout phase if setting up your product there’s a “Success Page” tab and the option you should enable when the purchase is complete is to “redirect to your custom page”. This sends students directly to your confirmation page after purchase. This is a much better user experience.

