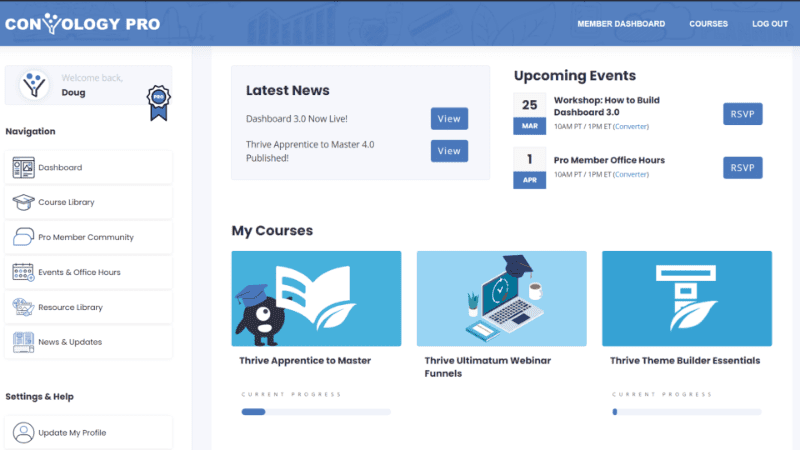
I recently rebuilt my dashboard for my membership site to take advantage of many new features available in Thrive Apprentice 4.0. I received a lot of questions about how I did it, and requests to make a tutorial.

Let’s dive in and look at how I built my member dashboard!
Watch the Step-By-Step Build Guide for My Thrive Apprentice Dashboard
I recorded the entire process for this tutorial to show you every step I took to make this dashboard using only Thrive Suite plugins for WordPress.
How to Create the Dashboard
Use a Standard Page
You’ll want to use a standard page. This is a page that uses your normal page template that you would have set up already in Thrive Theme Builder.
Start with a Background Section
Everything will be placed inside one background section. We use a background section because we can stretch this container to the full width of the page.
Background sections also work with Conditional Display (more on that below) so that you can do some really nifty tricks with combining this page and a login form.
Use Columns Instead of a Sidebar
Since we’re using a standard page, we won’t be using a sidebar. Instead, we’re going to put a 2-column element into the background section and narrow the left column to 25%.
Decrease the gutter from 15% (default) to 0%.
Place a content box inside the right column, and add padding to create the effect that your content box (with an applied background color) is floating away from the “sidebar” (left column), thus creating a distinct look.
Use a Vertical Menu
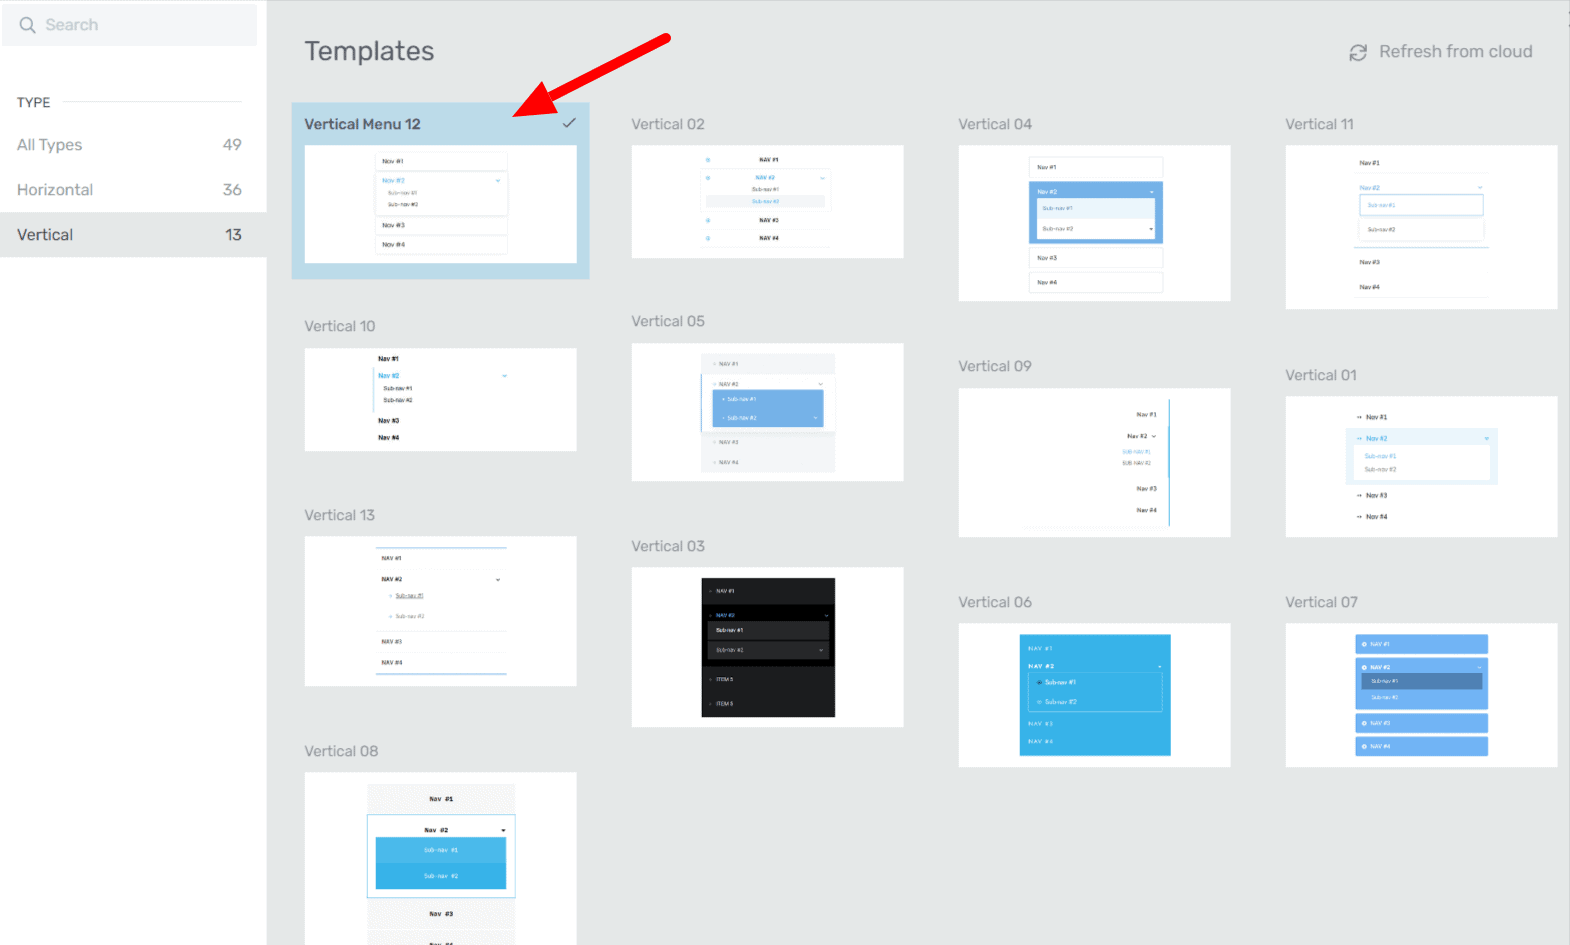
In the left column, add a vertical menu. I recommend “Vertical Menu 12” from Thrive’s pre-built templates. This template comes with all of the shadows and hover effects we want for our menu already built for us!
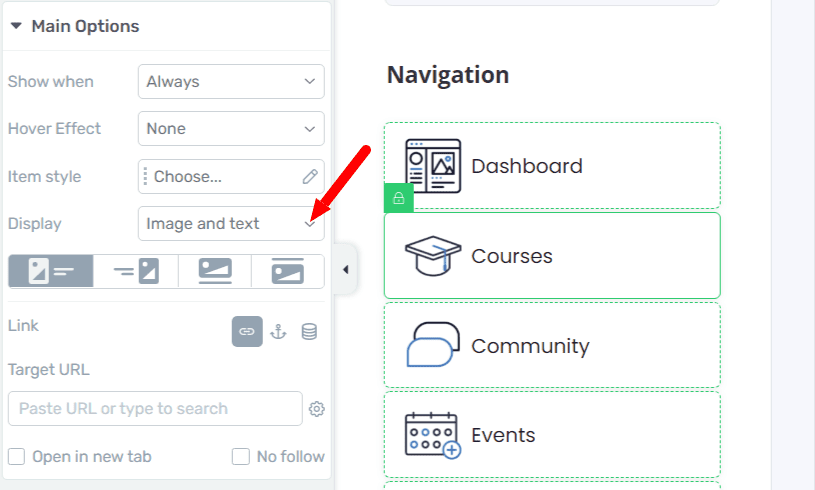
With your menu, select a menu item and look for Main Options in the settings.
You need to turn on “Image and Text” so that you can add pictures to the left of the menu item. If you prefer to use the included icon packs with Thrive, you can choose “Icon and Text” instead.
Add a Custom Greeting with Dynamic User Data
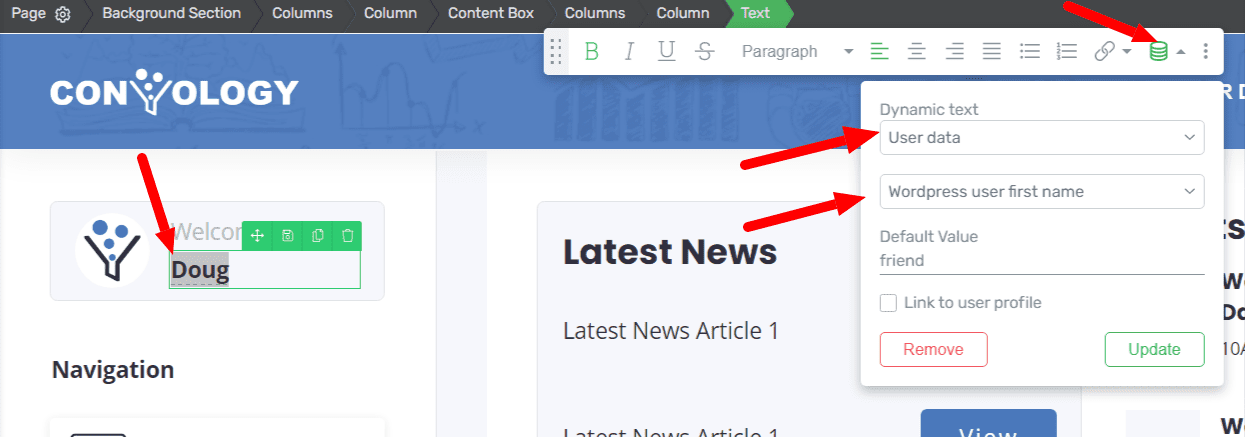
It’s a nice touch to add someone’s name to the dashboard. This can be done by selecting the text and going to the “kitchen sink” text options in the top middle of the screen. Choose the stacked disc icon and select User Data under dynamic text, then choose WordPress user first name.
Show Only Courses the Student Can Access
Whether your courses are free or paid for, I think it’s a good idea to show only what the student or member can access on their dashboard. You can add a separate link to the entire course library in your vertical navigation.
Select the course element and add it to your dashboard in the right column.
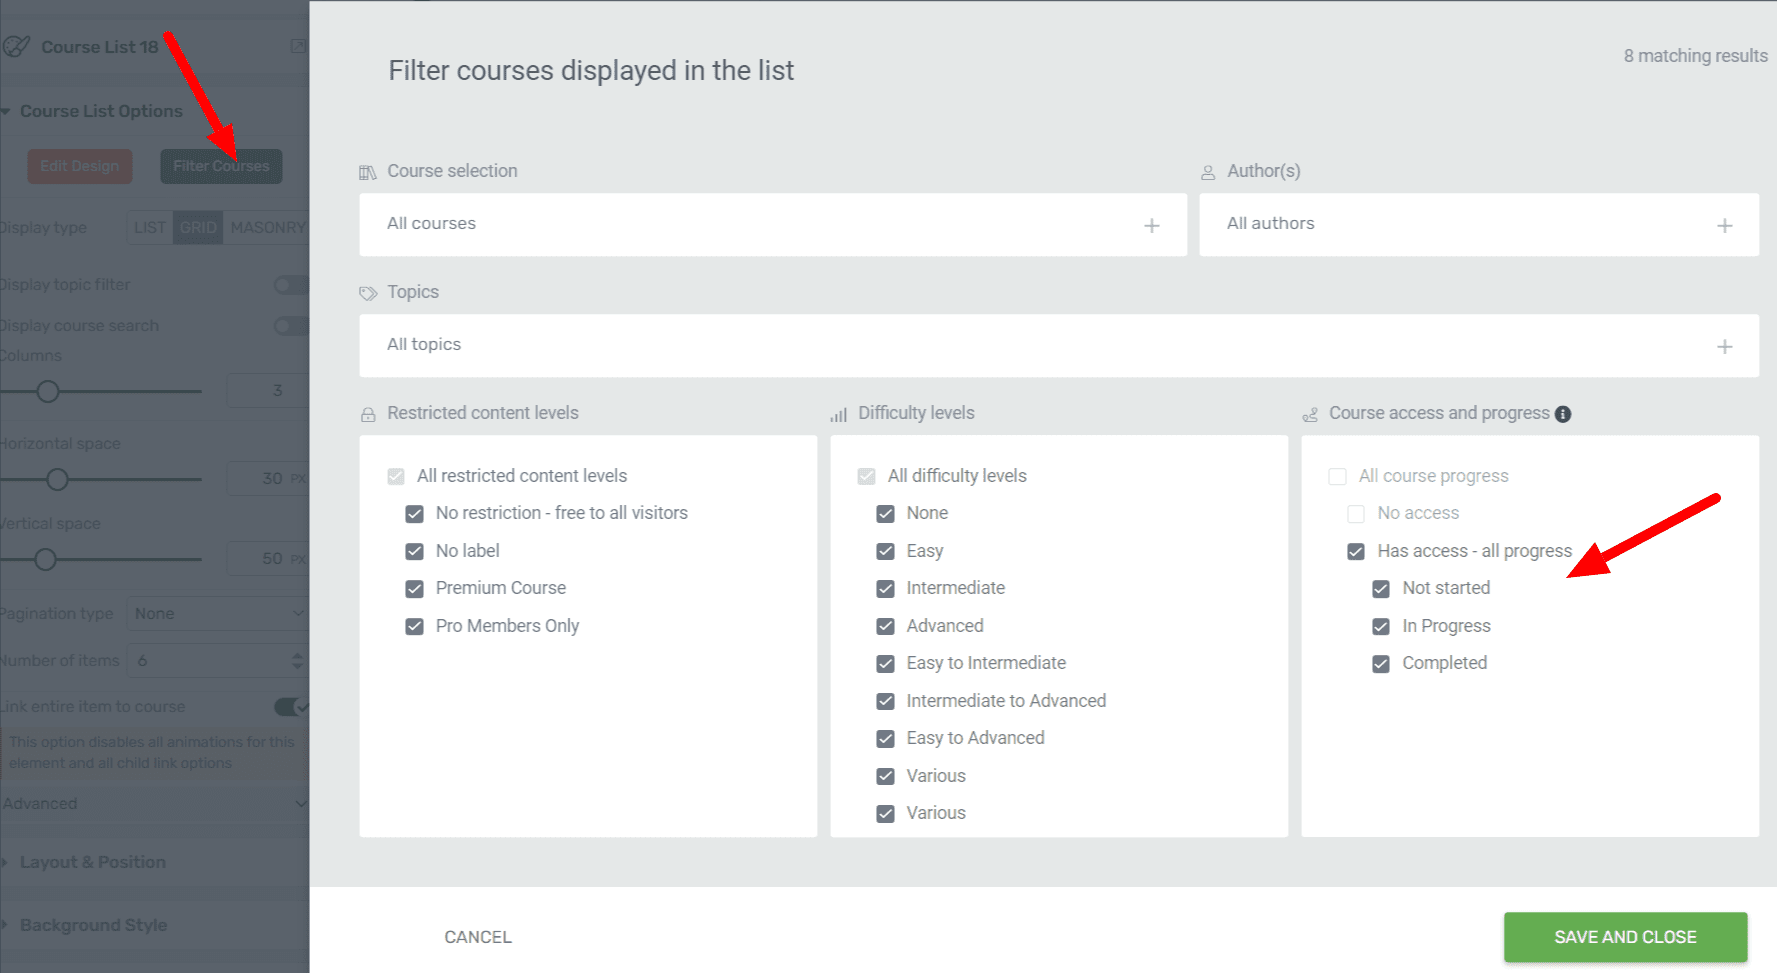
Select the element and in the upper left sidebar settings under “Course List Options” choose Filter Course.
Uncheck “No Access” so that you do not show courses the user has no access to, and make sure the other boxes are checked as shown below.
Add a News Section and an Events Section
Other components you may wish to add to your dashboard include events and a post list. If you have a blog, or link off to a news section of your community tool, you can add this using either a post list or manually input the news.
I built my calendar section by hand, which I show you how to do in the video above.
Combine Your Dashboard with a Login Page Using Conditional Display
I have another tutorial here at Convology with a step-by-step tutorial for combining your login page and dashboard into a single page so that the moment a student logs in they are shown the dashboard.
View the Conditional Display Login Page and Dashboard tutorial.

