Migrating to Thrive Theme Builder introduces the same challenges as migrating to any new theme. These challenges are tied to what your existing theme manages for the look, feel, and presentation of your website. These things include fonts, colors, layouts, and in many cases a lot of customization.
In this post I’m going to walk you through preparing for and implementing the migration process to ensure you run into as few problems as possible.
Overall Site Design

Do you want to rebuild your site as close to what you have now, or do you want to completely rebuild something new? Decide on a design and keep in mind that you’ll have nearly complete control over the design of:
- Header and Footer Template
- Blog Post List Template
- Blog ‘Single Post’ Template
- Archive Template
- Color schemes
- Fonts / typography
Having a plan head of time for how you want to handle these key components of a theme can help save time and help to develop a cohesive looking site.
What’s Going to Change When Migrating to Thrive Theme Builder
Essentially, all of the same core structural components you have design control over. If you’ve made any customizations to your website’s theme functions or files you will lose those when you transition to TTB.

Pages and Posts Built Using Thrive Architect
Any pages built using Thrive Architect will continue to function exactly like they did before. If you used Thrive Architect to build Pages and Posts, those exact designs will now function within the ‘content area’ of your new pages and posts.
Pages and Posts Built Without Thrive Architect (Default WYSIWYG / Gutenberg)
These pages and posts will also function exactly as they did before changing themes. Thrive Theme Builder will simply place this content within the designated content area of the new TTB design.
Any styles relying on the style sheet of your current theme will inherit the new styles you configure in Thrive Theme Builder. For example, if your H2 was 40px and Roboto Condensed Font with a weight of 600, you will lose those specific style settings unless you set Thrive Theme Builder to have the same typography settings.
If you do not configure any new styles, your typography will inherit the default settings of the default Thrive Theme Builder styles default theme.
Working Live vs. Staged
If you install and activate Thrive Theme Builder, you will immediately be walking through the site setup wizard on your live website. Depending on your familiarity with Thrive Theme Builder, the size of your audience visiting your website, and how fast you can work, this could pose quite a problem.
You have two options to avoid editing your website live:
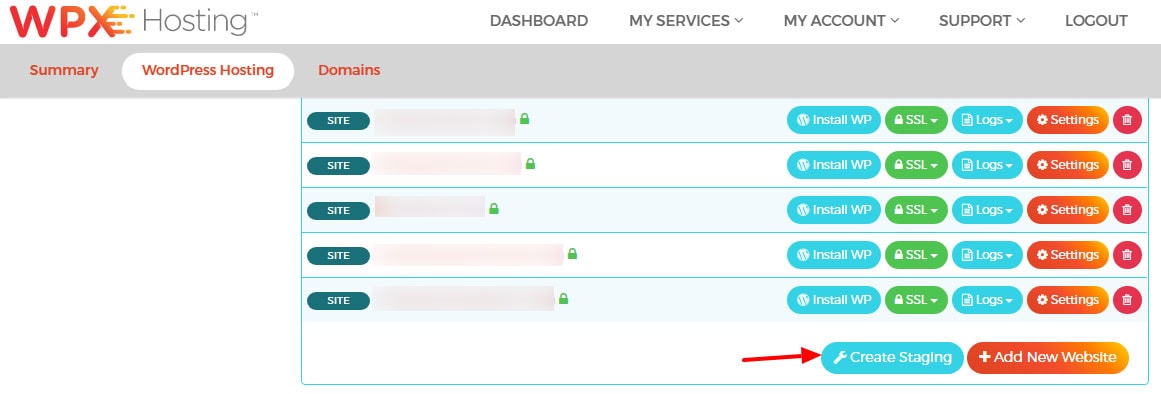
Build On a Staging Environment
Many hosts offer staging environments. My particular host of choice for Thrive Themes hosting is Bigscoots. They offer a simple one-click to create a staging environment, and a one click to push that staging environment live.
Import a Theme Design from Another Website
Similar to a staging environment, Thrive Theme Builder allows you to export and import your themes from one website to another. This extremely simple process takes seconds and will bring over the templates, images used in the templates, color choices, typography, etc. This is my method of choice rather than dealing with staging environments.
Note: I am currently developing free and premium Thrive Theme Builder themes for distribution. Please feel free to let me know what types of theme designs you’d like to see and I’ll prioritize those for you.
Configuring Templates in Thrive Theme Builder
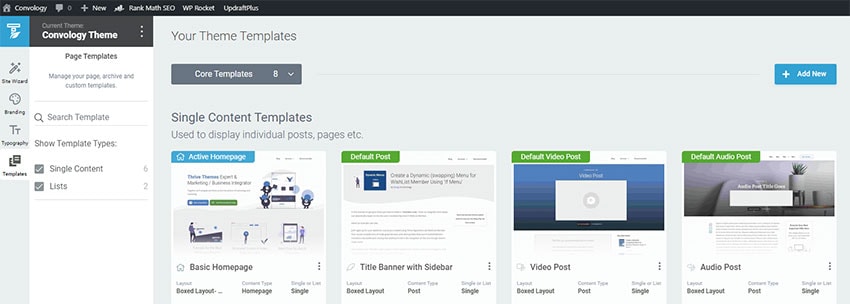
Walking through the site wizard is fairly straight forward, but many of my clients are noticing that things can be come a little less clear after they’ve chosen their logo, colors, and fonts. Now it’s time to edit the templates, and for many people this part becomes overwhelming.
I plan to release more in-depth articles on each of the templates as well as making edits to templates in the future, but for now I’d like to briefly go through the three most important templates that will satisfy most people’s immediate theme needs.
Page Template
The post template is likely the simplest for many of you. For me, I actually disabled everything. I like my ‘pages’ to be developed entirely within Thrive Architect without any structured design in sidebars, top areas, or bottom areas. So my personal page template is literally a blank page with just the header and footer.
You may wish to have a static offering at the top such as an opt-in for a lead magnet or hard-code the title of your page to appear in some fashion.
Single Post Template
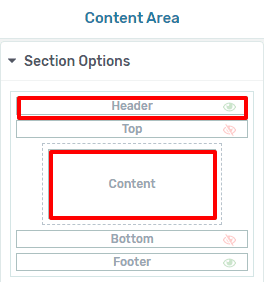
The ‘single post’ or ‘blog post’ template is what dictates the design of all of your posts. In fact, this post you’re reading right now is my own single post template. It includes a sidebar, a top section (with my featured image and post title), featured image, and comments.
The content of this post was written and built using Thrive Architect like I would any blog post and was written within the ‘Content’ area of the template.
Post List Template
In addition to the sidebar, top, and bottom areas, the post list is a template that affords you the opportunity to completely design how all of your posts are showcased.
Start Simple and Grow
If I can emphasize anything to you its that you can start simple and develop your website actively as you go. Once you have the basic structure in place, which is really what matters most, you can tweak and tinker. That’s what I do. I tinker and build upon my site a little bit each day.
Remember, the most important part of your website is the content. Having an existing website migrating to Thrive Theme Builder, you should already have the most important part done already. Don’t let yourself fall into a rut focusing too much on design and how things look. Get your site live as quickly as you can and learn, grow, and iterate from there.

