Thrive Automator can now accept incoming webhooks. This opens up all of Thrive Suite, mostly Thrive Apprentice, to connect to any tool that can use a webhook.
We can use these webhooks to send data to Thrive Apprentice and automatically enroll students in a course.
This process is very similar to my previous tutorial where we looked at how to use Thrive Apprentice courses as lead magnets. However, this time we are sending user data in from an external tool outside of our website rather than using an internal Thrive Form.
I highly recommend the video tutorial for this advanced lesson which you can view below.
Step 1: Create a Thrive Automation
For the trigger, choose incoming webhook. This will give you a webhook URL that you will need to copy. We will use this in our external tool.
Below the webhook url is a key and content type pairing. This is how we map the data that the external tool is sending through the webhook url. Thrive Automator has a really convenient “Listen” feature that will automatically set most of this up.
Let’s pause here. Leave this open in a tab and let’s go to Step 2.
Step 2: Get the External Tool for Sending Data Ready
The type of tool we’re using here is one that sends data. These vary from email marketing tools like Activecampaign to CRMs, cart solutions, Zapier, or lead-gen tools.
For this tutorial I’m going to use ConvertBox which is a lead-gen and segmentation tool that is an external tool and not part of my WordPress website. ConvertBox is owned by the same people who built ThriveCart. It’s a phenomenal tool that I use every day in my business.
ConvertBox webhooks work really well with Thrive Automator.
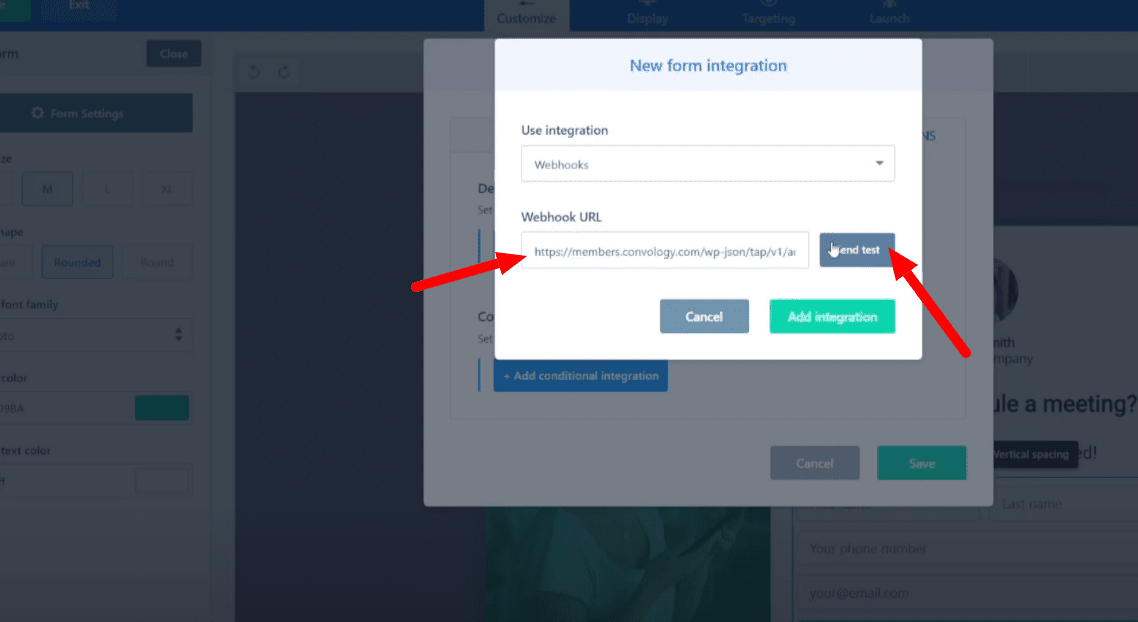
Create a form in your tool and for the integration select Webhook.

Swap back to the Thrive Automator tab you left open and copy the webhook URL if you don’t have it on your clipboard, and press Listen.
Go back to your external tool and paste the copied url into the Webhook URL field. Press send test.
Go back to Thrive Automator and you should see data has populated the fields.
You can finish setting up your external tool now.
For ConvertBox, I like to have mine redirect to a confirmation page on my website if I’m registering a user for a free course as a lead magnet.
Step 3: Finish Thrive Automation Setup
We don’t need all of the data sent to us by ConvertBox. We’re just going to keep the “email” and “First_name” fields. You can delete the rest. If your email field was paired with a text option, swap that to email as well.
We’re done with this trigger.
Add another action using the plus button.
We now want to give the user, whose data we just received, access to our course. So we’re going to create an account for them (or match their info to an existing account) using this data by selecting the Find or Create User action.
Select the Subscriber role.
Add another action using the plus button.
This time we’re going to “Grant access to product“.
Choose the course that they’ll be enrolled in.
Optionally you can now add another action to add the user and their info to your autoresponder/email marketing tool. You can add another action to tag the user.
Name this automation, publish it, and save.
Step 4: Edit Your New Account Created Template
Go to Thrive Apprentice settings > Email templates > New account created
Here you can customize the email that Thrive Apprentice sends when a user gets an account on your website to access your courses and products. This is the same email for ALL of your courses and products, so keep it general.
The part of this template that you must keep is the shortcode for the username and password. Otherwise, it’s yours to customize to your needs.
Be sure to check the box at the bottom for ‘When a user registers to create a new free account‘.

